Friday, November 20, 2015

Scotch Eggs

Once upon a time there was a pig named Notorious P.I.G. Piggy Smalls. 
 
true story...


... and let me tell you, he earned his name! But that's a story for my other blog. Anyway, he provided us with some yummy meat. The last of the meat is about to be made into Scotch Eggs this weekend.

The first thing you need to do to make Scotch Eggs is to make some sausage. There's plenty of recipes out there for making sausage, and though I wish I could put my hands on the recipe for Hinderers sausage, we rely on the good old Joy of Cooking for our recipe. 

Truly, the Joy of Cooking is all Shane uses for this recipe. It is the golden standard. 
Here's a picture of the recipe from the book. If you don't own a copy please go get one now. 
In the mean time, you can see the pictures to guide you through. 
 

 Using barely hardened eggs (an art I will never seem to master)


take a lump of sausage and form it into a patty in your hand. 


 then carefully, oh so carefully, surround it entirely with sausage.


 See this amazing toasted brown round bundle of goodness?


Just look what happens if you are as talented in making these as SP is. 

HEAVEN ON EARTH! Happy breakfast!

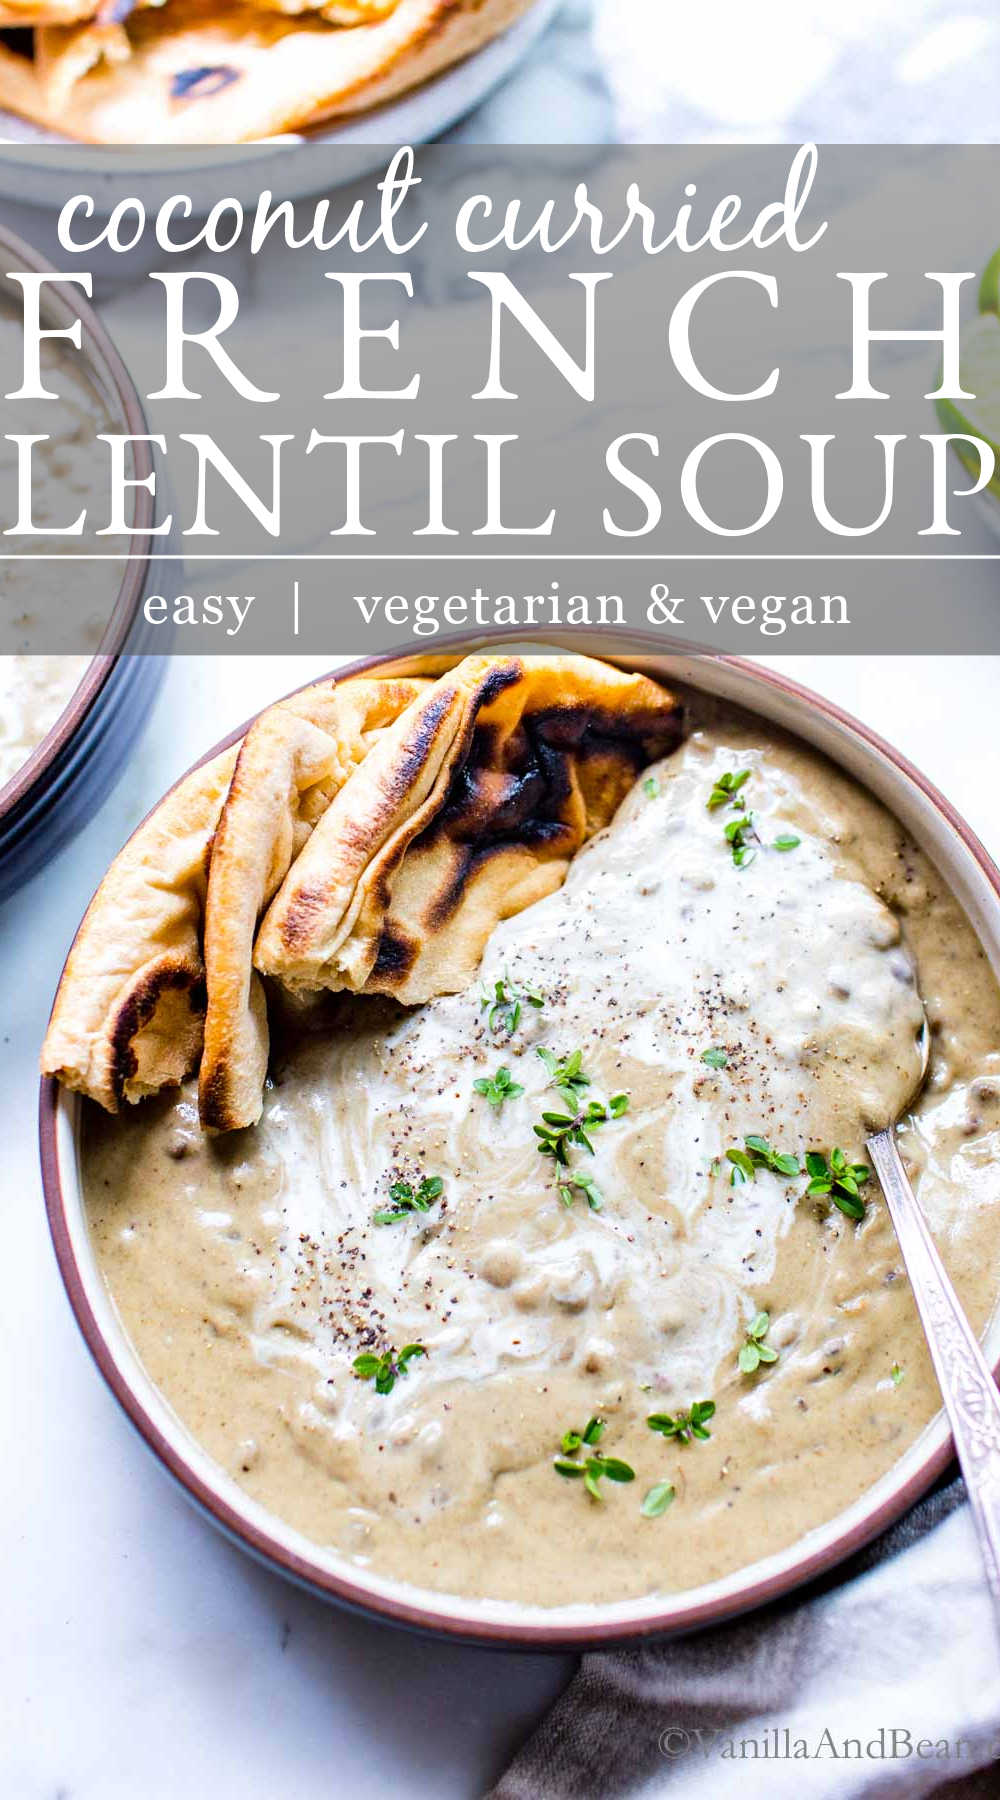
Coconut Curried French Lentil Soup


Coconut Curried French Lentil Soup | Vanilla And Bean


Coconut Curried French Lentil Soup
Ingredients
  • 2 Tbs Coconut Oil
  • 3 Cloves of Garlic, minced, about 1½ Tbs
  • 1 Yellow Onion, small dice, about 1 C
  • 1½ tsp Cumin, ground
  • 1 tsp Curry Powder (I use hot madras)
  • 1 tsp Thyme, dried
  • ½ tsp Cinnamon, ground
  • 6 C Vegetable Broth
  • 1½ C French Green Lentils (aka Lentiles du Puy), picked through and rinsed
  • 2 Bay Leaves
  • 1 Can of Coconut Milk (14 oz) with 2 Tbs reserved for drizzling
  • ½ tsp Sea Salt
  • ½ tsp Ground Black Pepper
  • 2 Sprigs of Fresh Cilantro, chopped, for garnish (optional)
  • 4 Sprigs of Fresh Thyme, for garnish

How To Make All Butter Buttermilk Pie Dough


All Butter Buttermilk Pie Dough and tutorial for rolling out dough and blind (par) baking a crust | Vanilla And Bean

From Vanilla and Bean
How To Make All Butter Buttermilk Pie Dough
Ingredients
  • Pan Spray
For One Disk (11-12 oz):
  • ½ C (113g) Unsalted Butter, refrigerated*
  • 3 Tbs Milk
  • 1½ tsp Apple Cider Vinegar
  • 1¼ C (190g) All Purpose Flour
  • 1 Tbs Granulated Sugar
  • ½ tsp Sea Salt
For Two Discs (11-12 oz)
  • 1 C (226g) Unsalted Butter, refrigerated*
  • 6 Tbs Milk
  • 3 tsp Apple Cider Vinegar
  • 2½ C (380g) All Purpose Flour
  • 2 Tbs Granulated Sugar
  • 1 tsp Sea Salt

Thursday, November 19, 2015

Shumai!


Shumai are open-topped dumpling,s stuffed with tasty ground meat and vegetable filling, then steamed. Tonight I will be making these with the first batch  of our own ground pork. I will likely close them and give them a quick pan sear for a seal and extra flavor before steaming. 


Ingredients
1 pound ground chicken (or pork)
1/4 cup unsweetened coconut milk
1/4 cup coarsely shredded carrot
2 Thai chilis, minced
2 Tablespoons chopped basil
2 Tablespoons Asian fish sauce
2 Tablespoons sugar
2 teaspoons fresh lime juice
1 garlic clove, minced
1 large egg beaten
1 small shallot, minced
1/2 teaspoon minced fresh ginger
1/2 teaspoon kosher salt
1/4 teaspoon freshly ground pepper
40 wonton wrappers
Green leaf lettuce leaves for steaming
special equipment: bamboo steamers
Soy sauce and Sriracha chili sauce, for serving

Process

1. In large bowl, combine the ground chicken with the coconut milk, carrot, chiles, basil, fish sauce, sugar, lime juice, garlic, egg, shallot, ginger, salt and pepper. Using your hands mixed thoroughly.

2. Follow the directions on the wrappers, create your shumai dumplings in the wonton wrappers. Repeat with the remaining wonton wrappers and filling. 


3. Fill a wok or a very large skillet with 2 inches of water and bring to a boil.

4. Line a double tiered bamboo steamer with lettuce leaves and arrange the shumai in the steamer without crowding.

5. Cover and steam over moderate heat until cooked through, about 10 minutes.

6. Repeat with the remaining shumai. You may also choose to pan fry them for extra crisp after the steam or even skip the steam all together. Yummy versatile and great for the whole family!

Serve immediately with the sauces.

Shu Mai


It looks like this recipe MAY have originated from a Food and Wine magazine. I found a nearly identical recipe here: Chicken and Coconut Shumai

Chicken Pot Pie Soup


  • 2 cups cooked chicken, cubed, I used 2 chicken breast & boiled them
  • 2 medium potatoes, peeled and cubed
  • 3 tablespoon butter
  • 2-3 tablespoons flour
  • 1 small yellow onion, finely chopped
  • 4 celery ribs, diced
  • 1 x 10 ounce bag frozen peas
  • 3 carrots or 12 mini carrots, chopped
  • 1 1/2 cups heavy cream or ½ & ½
  • 4 cups water
  • 2 ½ tablespoons chicken base
  • 4 teaspoons Montreal Steak seasoning
  • Salt and pepper, to taste


Bring
a large pot of water to a boil, once water is boiling add in potatoes
and cook until tender. Strain potatoes from pot and set them aside in a
bowl.

In a large pot, over medium to high heat add butter, once butter has
started to melt add in carrots, cook for 1-2 minutes, then add in onion
and celery, season vegetables with 2 teaspoons of Montreal Steak
seasoning. Cook until onions are translucent. Add in water and chicken
base, bring is a boil. Let it cook over medium heat for 10-15 minutes.
In a water bottle or cup with lid add ½ cup of ½ & ½ with the flour,
shake vigorously. Add in the remainder of the milk to the pot and then
add in flour mixture. Add in frozen peas, potatoes and cubed chicken,
season with salt and pepper and add an additional 1-2 teaspoons of
Montrell Steak seasoning. Let it simmer 30 minutes, until the soup
starts to thicken.
Remove from heat and let it sit for 5-10 minutes to cool, then serve.


Chicken Pot Pie Soup'

YUM!

Tuesday, November 17, 2015

Grilled Mexican Street Corn


This recipe is ripped straight out of a Hannaford Express this summer. This corn recipe is hands down one of my all time favorites.

Cuban Stromboli from Wine and Glue


This recipe from Wine and Glue was an excellent find this week. 
It was quick and easy and oh so kid friendly. 
I went liberal on the first batch I made and discovered that it could have used more kick to it. So I made it a second time last night and nailed it. 
That's what the above picture is from. Yummy stuff folks that we highly recommend!

Ingredients
  • 1 tsp olive oil
  • 1/2 lb. Spicy Italian Sausage (I used Jennie-O)
  • 1 (13.8 oz) tube refrigerated pizza dough
  • 7 slices swiss cheese
  • 6 slices black forest ham
  • 8 sandwich style dill pickles
  • 2 TBSPs mustard
  • 1 TBSP mustard
  • 1/2 tsp garlic salt
Instructions
  1. Preheat your oven to 375 degrees.
  2. In a cast iron skillet, preheat your olive oil and then cook your Spicy Italian Sausage until completely cooked through, crumbling it as you cook.
  3. On a silicon mat lined baking sheet, spread out your refrigerated pizza dough until it is about 14 by 12 inches.
  4. Spread out your swiss cheese, spread the mustard over it, layer it with the slices of ham, the pickle slices and the cooked sausage.
  5. Carefully roll up the dough, starting with the long end, and then place it seam side down and pinch both ends closed.
  6. Brush the dough with the melted butter and sprinkle with the garlic salt.
  7. Bake for 20 to 25 minutes or until golden brown. Let stand for 3 to 5 minutes before slicing

Leek and Caramelized Fennel Dip


This dip was a yummy thing to do with freshly harvested garden leeks. It was a pleasure to make on a crisp Saturday afternoon, filling my house with the decadent scents of caramelized fennel.


I found this recipe on the blog A Cozy Kitchen and it is my hope that I get Adrianna's new book A Year of Cozy for Christmas!

As I assembled it I had a moment of pause teetering on regret.
This LOOKS like pate - it's not going to taste like fois gras?


It turned out just find despite my hesitation. It heated up very nicely, but next time I might top it with a more melty cheese than the shredded pizza mozzarella I used. It just never got as bubbly as I wanted.

Ingredients
  • 1 tablespoon olive oil
  • 2 fennel bulbs (1 1/2 lbs), *thinly sliced with a few fronds reserved as garnish
  • 1 leek, thinly sliced
  • 2 garlic cloves, minced
  • 7 ounces brie cheese, room temperature and removed from the rind
  • 2 ounces (about 1/2 cup) shredded Parmesan-Reggiano
  • Zest from 1 small lemon
  • 1/2 teaspoon salt
  • 1/4 teaspoon crushed red pepper
  • 1 ounce (about 1/4 cup) shredded mozzarella
  • Bread or crackers, for serving
Directions
  1. Preheat the oven to 350 degrees F. In a medium skillet, set over medium heat, add the oil. When hot, add the fennel and sear on both sides, for about 1 to 2 minutes per side. You may need to do this in batches depending on how big your skillet is. See note below for slicing the root end off each slice. After you’re done with the fennel, transfer it to a food processor.
  2. In the same medium skillet, add a teaspoon of olive oil, if needed. Add the leeks and cook, mixing often, until softened, about 2 to 3 minutes. Mix in the minced garlic and cook until fragrant, about 1 minute. Transfer the leek mixture to the food processor, along with the brie cheese, Parmesan-Reggiano, lemon zest, salt and crushed red pepper. Pulse until mostly smooth, about 30 seconds. Give it a taste and adjust the salt to your liking.
  3. Transfer to a small oven-safe baking dish or bowl. Top with the shredded mozzarella and place in the oven until the cheese is melted and browned on top, about 15 to 20 minutes. Serve with slices of bread or crackers.


Serve with slices of baguette and a knife and Voila! Perfection!

Saturday, November 14, 2015

Cuban Stromboli from Wine and Glue!


This Cuban Stromboli is SO easy to throw together, and absolutely delicious! It will become a new family favorite!

I will be making this yummy recipe from Wine and Glue for dinner evening! Of course it will be my rendition of it since I am not a fan of sausage, so I will post pictures in a new post later on. My tummy has been growling for this since I set my mind on it yesterday!


Cuban Stromboli - Wine

Friday, November 13, 2015

Making Salsa Verde

I made my first of several batches of salsa verde this fall. Most of my tomatillos I froze so that I could make them at a later date. The garden was just cranking out too much food for me to deal with things that could be put off until later.

But after that first cold snap in October I realized that it was time to make salsa as these could have been the last ones I harvested. I was close but do have another small bowl hidden away in my fridge.

Salsa Verde is one of the more standard and simplistic recipes. For this version I chose a recipe from one of the new blogs I follow: Cookie and Kate.

You can find the original recipe HERE.

Ingredients
  • 1½ pounds tomatillos (about 12 medium), husked and rinsed
  • 1 to 2 medium jalapeños, stemmed (omit for mild salsa, use 1 jalapeño for medium salsa and 2 jalapeños for hot salsa, note that spiciness will depend on heat of actual peppers used)
  • ½ cup chopped white onion (about ½ medium onion)
  • ¼ cup packed fresh cilantro leaves (more if you love cilantro)
  • 2 tablespoons to ¼ cup lime juice (1 to 2 medium limes, juiced), to taste
  • ½ to 1 teaspoon salt, to taste
  • Optional variation: 1 to 2 diced avocados, for creamy avocado salsa verde
Process
1. Preheat the broiler with a rack about 4 inches below the heat source.

2.  Place the tomatillos and jalapeño(s) on a rimmed baking sheet and broil until they're blackened in spots, about 5 minutes.

3. Remove the baking sheet from the oven, carefully flip over the tomatillos and pepper(s) with tongs and broil for 4 to 6 more minutes, until the tomatillos are splotchy-black and blistered.


4. Meanwhile, in a food processor or blender, combine the chopped onion, cilantro, 2 tablespoons lime juice and ½ teaspoon salt. Once the tomatillos are out of the oven, carefully transfer the hot tomatillos, pepper(s) and all of their juices into the food processor or blender.

5. Pulse until the mixture is mostly smooth and no big chunks of tomatillo remain, scraping down the sides as necessary. Season to taste with additional lime juice and salt, if desired. If you'd like to make creamy avocado salsa verde, let the salsa cool down before blending in 1 to 2 diced avocados (the more avocado, the creamier it gets).


(I omitted the avocado in this recipe as I did not have it on hand)

Sunday, November 1, 2015

Sugar Cookie Dough


This is my favorite dough for sugar cookies any time of the year. The Pickle and I made Halloween cookies yesterday. It makes at least 4 batches of cookies, so break out your cookie cutters and get baking!

Ingredients
4 sticks unsalted butter, at room temperature
2 cups sugar
2 large eggs
2 Tablespoons pure vanilla extract
2 teaspoons salt
5 cups all purpose flour


Process
  1. In an electric mixer fitted with the paddle blade, combine the sugar and butter on high speed until fluffy.
  2. Add eggs, vanilla, and salt and mix on medium until combined.
  3. Turn mixer to low, and slowly add flour in batches mixing until combined (it will be a bit stiff).
  4. Remove dough from bowl, and divide into four balls.
  5. Place each ball on plastic wrap, flatten into discs, completely wrap in plastic wrap and refrigerate until ready to use (at least 30 minutes - but it lasts up to 2 weeks).
  6. When ready to use let the dough warm a bit on the counter. Preheat the oven to 350 degrees.
  7. On a well floured surface, roll out dough until about 1/8 of an inch thick.
  8. Cut out cookies with cutter of choice, place on an un-greased baking sheet, and decorate as desired.
  9. Bake until golden brown - about 10 to 15 minutes.


Tuesday, October 27, 2015

Slow Cooker Chicken Curry from the Lemon Bowl


Slow Cooker Chicken Curry 
We made this last night for our evening of pumpkin carving. I really like the incorporation of Sweet potatoes in this and need to be honest that I really doubted they would be done in time. I procrastinated as long as possible to open the crock but to my pleasurable surprise everything was done completely. Even the kids ate it adding a dollop of sour cream/ yogurt to it. We will definitely do this again, maybe adding a bit more kick next time.


Slow Cooker Chicken Curry from The Lemon Bowl

Ingredients
  • 1 pound boneless, skinless chicken breasts
  • 1 medium onion - thinly sliced
  • 15 oz can chickpeas - drained and rinsed
  • 2 medium sweet potatoes - peeled and diced
  • ½ cup coconut milk - light
  • ½ cup chicken stock - low sodium
  • 15 oz can tomato sauce
  • 2 tablespoons curry powder - salt-free
  • 1 teaspoon salt
  • ½ teaspoon cayenne powder - optional
  • 1 cup green peas - frozen
  • 2 tablespoons lemon juice
  • cilantro - optional garnish
Instructions
  1. In the bottom of the slow cooker, whisk together coconut milk, chicken stock, tomato sauce, curry powder, salt and cayenne.
  2. Add chicken breasts, onion, chickpeas and sweet potatoes. Using tongs, gently toss ingredients together to ensure evenly coated.
  3. Cook on Low for 8 hours or High for 4 hours.
  4. Stir in peas and lemon juice 5 minutes before serving.
  5. Serve over rice and with plenty of fresh cilantro.

Tuesday, October 20, 2015

Butternut Squash & Bacon Deviled Eggs


Butternut Squash Deviled Eggs with Bacon 


 Another Must do recipe from Snixy Kitchen! She is my new favorite and I love her for her ingredient transformations!

Butternut Squash & Bacon Deviled Eggs

Butternut Squash and Bacon Deviled Eggs
Author: 
Yields: 12 deviled eggs
 
Ingredients
  • 1 small butternut squash (.75 to 1 pound)
  • 6 large eggs
  • 2 tablespoons mayonnaise
  • ⅛ teaspoon cayenne, plus more for sprinkling
  • ⅛ teaspoon salt
  • ⅛ teaspoon nutmeg
  • 2 slices of cooked bacon, crumbled
Instructions
  1. Cook the butternut squash. Prick the squash with a fork several times. You can roast the whole pricked squash at 375°F for about 30 minutes, until tender. Alternatively, you can microwave it for 5 minutes, cut it in half lengthwise, and microwave both halves cut-side down for another 5-8 minutes, until tender. When the squash is tender, remove and discard (or save) the seeds and scoop out the filling.
  2. Place the cooked squash in a food processor or blender and blend until smooth. Measure out 6 tablespoons of squash for the deviled eggs.
  3. Meanwhile, hard-boil the eggs. Place the eggs in a large pot and cover with at least 2 inches of cold water (*see note). Bring the water to a rolling boil over medium-high heat. Remove the pot from the heat and cover for 11 minutes. Remove the eggs from the pot and run them under cold water to stop the cooking. When they're cool enough to handle, peel the eggs, slice them in half lengthwise and scoop out the yolks into a mixing bowl.
  4. Add the 6 tablespoons of butternut squash purée to the bowl with the yolks, and mix. Add the mayonnaise, cayenne, salt, and nutmeg and mix until smooth (you can also return this mixture to the food processor or blender if you want it super smooth).
  5. Divide the filling among the egg halves (either using a spoon or pipe it in using a piping bag).
  6. Top with a few crumbles of cooked bacon and sprinkle cayenne on top. Refrigerate until serving.

Friday, October 16, 2015

Spaghetti Squash Fritters with Dill Yogurt Sauce


Spaghetti Squash Fritters with Dill Yogurt Sauce 


This was such an amazing meal that truly transformed the main ingredient - Spaghetti Squash! Thank you Snixy Kitchen - you are a wonderful find!


Spaghetti Squash Fritters with Dill Yogurt Sauce

Spaghetti Squash Fritters with Dill Yogurt Sauce
Author: 
Yields: About 16 fritters
 
Ingredients
Spaghetti Squash Fritters
  • 1 small or ½ large spaghetti squash
  • 2 teaspoons olive oil
  • 3 large shallots, finely chopped
  • ¼ cup parsley, finely chopped
  • ½ teaspoon ground cumin
  • ½ teaspoon turmeric
  • ¼ teaspoon ground cinnamon
  • 1 teaspoon sugar
  • ½ teaspoon salt
  • 1 egg white
  • ½ cup chickpea/garbanzo flour
  • 3 tablespoons sweet rice flour
  • 2 tablespoons tapioca starch or flour
  • 1 tablespoon baking powder
  • 1 egg
  • ½ cup whole milk
  • 3 tablespoons unsalted butter, melted
Dill Yogurt Sauce
  • ¼ cup greek yogurt
  • ¼ cup sour cream
  • ½ cup packed parsley
  • 2 tablespoons fresh dill
  • 1 tablespoon fresh lemon juice
  • 1.5 tablespoon olive oil
  • 1 clove garlic
  • ¼ teaspoon salt
Instructions
Spaghetti Squash Fritters
  1. Cook the spaghetti squash. Prick the squash with a fork several times. You can roast the whole pricked squash at 375°F for about 45 minutes to an hour, until tender. Alternatively, you can wrap the pricked squash in parchment paper and microwave it for 15-20 minutes, until tender. When the squash is tender, slice it in half lengthwise and use a fork to scrape out 2 cups of filling. If the filling is super moist, let it sit in a fine mesh strainer while you cook the shallots.
  2. Heat the olive oil in a pan and cook the chopped shallots until tender, about 5 minutes. If you're roasting the squash, you can also roast the shallot whole and then peel and chop it when it's tender.
  3. Combine the 2 cups of squash, cooked shallots, parsley, cumin, turmeric, cinnamon, sugar, and salt in a large bowl.
  4. In the bowl of a stand mixer fitted with a whisk attachment, by hand, or with a hand mixer, whip the egg white until soft peaks form. Gently fold the egg white into the squash mixture.
  5. In another bowl, mix together the chickpea flour, sweet rice flour, tapioca starch, and baking powder.
  6. Add the egg, milk, and butter to the flour and whisk to combine.
  7. Gently add the batter to the squash mixture and stir to combine.
  8. If using an electric waffle iron, cook small waffles according to manufacturer directions, lightly spraying the iron with canola oil.
  9. If using a stovetop waffle iron, be sure to heat up both sides for at least 3 minutes on medium heat. Lightly spray the top and the bottom of the waffle iron with canola oil. Pour scant ¼ cup of batter into each section of the waffle iron and cook for 2-3 minutes. Flip the waffle iron and cook for another 2-3 minutes. Gently open the waffle iron to check the waffle and, if needed, continue cooking until both sides are crispy. (Every stove is slightly different, but mine is ready after 2.5 minutes both sides).
  10. Use a chopstick to help you gently remove the waffles from the iron and transfer to a plate while you finish cooking the batter. The outsides should be crispy and the insides will be soft and moist.
  11. If you don't want to use a waffle iron, you can cook the fritters over medium heat on a griddle. Scoop ¼ cup of batter onto the griddle and cook for 2 minutes on each side, until crispy on the outside, but still soft on the inside.
  12. Serve waffles with dill yogurt sauce (below). Store leftovers for up to 3 days in an airtight container in the refrigerator and reheat in the toaster.
Dill Yogurt Sauce
  1. Combine all of the ingredients in a blender or food processor and pulse until smooth.

Sunday, October 4, 2015

Watercress Pesto


Watercress Pesto


From The Bite House

Ingredients

• 1 cup pecans (or walnuts)
• 1/2 cup sunflower seeds
• 2 cups packed watercress
• 1 1/2 cup grated parmesan
• 3/4 cup olive oil
• juice of one lemon
• 3 garlic cloves
• salt + ground black pepper
Dry toast the nuts and seeds in a pan, shaking, until they’re ready.
In a food processor, whizz the nuts and seeds until finely shredded.
Add all the other ingredients, and whizz again.
Season with salt and pepper and adjust to desired consistency with olive oil.
Serve with fresh bread.

Freezer Salsa


I made this tonight from nearly the last of my sun gold tomatoes. I will make one last ground cherry salsa with the truly last of them tomorrow night. I am exhausted. It has been a huge weekend on the homestead.

Thank you to Emilie and The Clever Carrot for posting this recipe for 10 Minute Sun Gold Salsa For the Freezer!

Ingredients

4 cups sun gold tomatoes, or red cherry tomatoes
½ cup diced red onion
¼-1/2 clove of garlic
1 large or 2 small bell peppers, roughly chopped with white ribs attached (I used both red & orange)
1 heaping cup of cilantro leaves, plus their thin stems from the top of the bunch
juice of 1 lemon or lime
½ tsp cumin
½ tsp coarse salt, plus more to taste
¼ tsp red pepper flakes (or less depending on preference)
drizzle of extra virgin olive oil

Process
  1. Add all of the ingredients into a food processor. Pulse a few times until the texture is roughly smooth. Give it a taste, and add more salt or lemon juice as needed. Sometimes, I'll throw in more cilantro when in the mood. Adjust to your liking.
  2. Working over a large bowl, strain the salsa reserving the liquid. Transfer the liquid into a small ziplock bag and freeze for future use (use as a base for rice, grains, soups etc.)
  3. To finish, drizzle your salsa with olive oil, to taste. Serve right away, or portion into snack size ziplock bags and freeze.
  4. Note: after defrosting, strain the salsa if necessary, depending on use. Salsa (with chips) is best enjoyed on the same day that it is made.

Thursday, September 24, 2015

Creamy Gazpacho


I would follow this recipe as is and do not double it. I tried that last night and it doesn't fit in the blender. This is a fantastic, quick and easy recipe to make.  I also skip the fancy crispy cheese addition as it just makes this recipe take much longer than I wanted after a long hot day at work.  The cheese option is made with the pecorino Romano and is step one in the photo above.

Enjoy!

Ingredients
2 large garden tomatoes (about a pound, cored)
1.5 cups plain yogurt (I use Greek for extra tang)
1/4 cup Olive oil
12 Basil leaves (best fresh out of the garden)
2 cloves garlic
2 scallions, chopped
2 ice cubes
2 teaspoons (shy) Kosher salt
1 Tablespoon red wine vinegar

Process
Combine ingredients in blender and process until smooth. Adjust seasonings to preference.

Tuesday, September 15, 2015

Ramen Salad with Tofu adapted from Gimme Some Oven


 Thanks to "The Mind of a Chef" we are obsessed with noodles so when I stumbled upon this late summer recipe on my blog feed I was hooked. Talk about a cheap and easy and likely home grown meal on an early September school night. It was heavenly and I can't wait to have left overs in my lunch box.


Adapted from THIS recipe on Gimme some Oven , I made use of garden carrots, beans, peppers, and zucchini in this easy yummy meal. I also served it with none other than my Rosemary Lemon Tofu for a spectacular kid friendly meal.


Ingredients:

  • 1 (16-ounce) bag coleslaw mix
  • 2 (3-ounce) packages of Ramen noodles, crumbled (discard the seasoning packet)
  • 1 avocado, peeled, pitted and diced
  • 1 large pepper julienned (or diced)
  • 1/2 cup thinly-sliced almonds
  • 1/2 cup thinly-sliced green onions (scallions)
  • shredded carrott
  • shredded zucchini
  • Asian honey vinaigrette (see ingredients below)

Asian Honey Vinaigrette ( Whisk all ingredients together until combined.)

  • 2/3 cup vegetable oil (or any cooking oil)
  • 1/3 cup honey (or agave, to make this vegan)
  • 1/3 cup rice wine vinegar
  • 2 teaspoons soy sauce
  • 1/4 teaspoon sesame oil
  • pinch of salt and black pepper

Directions:

To Make The Salad:

1.  Heat oven to 425 degrees.
2. Spread the crumbled ramen noodles and sliced almonds out on a baking sheet, and stir a bit to combine.
3. Bake for about 5 minutes, or until the almonds and noodles are slightly toasted and golden.
4. Remove baking sheet, and give the mixture a good stir to toss. Then return it to the oven and toast for an additional 3 minutes. Keep a very close eye on the mixture so that it does not burn. Remove and set aside.)

5. Add ingredients (including the vinaigrette) together in a large bowl, and toss until combined.
6.   Serve immediately, or cover and refrigerate for up to 3 days.

* This salad is much better eaten the first day, as the noodles lose their "crunch" the longer it sits, and the avocado may brown. *