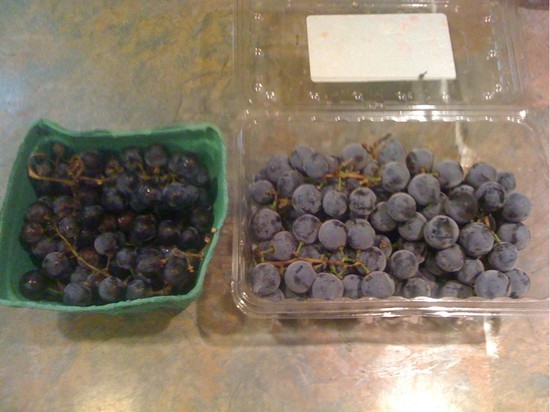
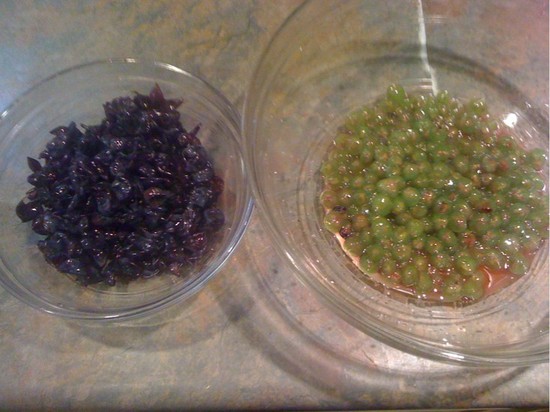
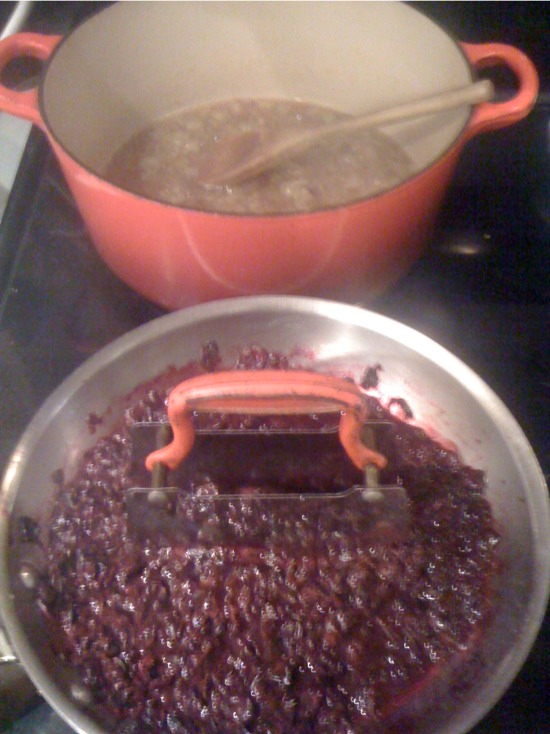
As part of the March Food in Jars Challenge, I made another shrub inspired by my desire to kick my immune system back into high gear. I thought the medicinal ginger and the antioxidant blueberries were quite the touch. I used Marisa's Blueberry Ginger Shrub recipe from Food in Jars and doubled it. If you do attempt this and double it, don't muddle in the quart jars as there just isn't enough room to move around, so use a 4 cup measuring cup before pouring it into the mason jar.
Ingredients (for a single recipe)
One heaping cup of blueberries
3/4 cup sugar
One cup unfiltered Apple Cider Vinegar (I use Bragg's)
2 inch piece of ginger, peeled
Process
1. Put blueberries in a mason jar and cover with the sugar.
2. Using a muddler or a pestle, mash the blueberries and sugar together and smash into a sweet pukpy mess. The more mess the merrier.
3. Add the vinegar to the jar and stir it all together, vigorously.
4. Grate the ginger over the mess in the jar.
5. Put a lid over the jar and give it a good shake. Dance around the kitchen with it for little while if it makes you smile. The shrub will love the entertainment.
6. Put your shrub in the fridge and let it hang out with it's friends for a few days. Here's mine with the Blood Orange Shrub and neighbors Salt Preserved Lemons. (darn A-1 trying to get its moment in the spotlight).
7. Day two or three, strain the Shrub.
8. Return to a covered mason jar and place in fridge. Use as a mixer in drink of your choice. Here's one recipe I found: http://www.saveur.com/carolina-blueberry-shrub-cocktail-recipe
Tuesday, March 14, 2017
Mint Jelly with all natural Pectin for the Food in Jars March Challenge
For the Food in Jars March Challenge, I once again threw my hat into uncharted water and tried this recipe for Mint Jelly. I was nervous about this recipe because it called for using apples to draw out the natural pectin. I intuitively knew this was the natural process but doubted that little ole me could pull it off. Would it work or fail miserably? Would it set? What if I didn't draw off enough liquid? I cursed myself apparently because I only drew off just over half the liquid and almost scrapped the whole project. I felt defeated and ready to throw in the towel, but SP boosted my spirits with some encouragement and then some laughter at my own expense - I looked like a hot mess and he still loved me. Nevertheless, I persisted.
Ingredients
- 4 lbs of tart apples (e.g. Granny Smith), un-peeled, chopped into big pieces, including the cores (including the cores is important as this is where most of the natural pectin is)
-

- 3 cups of fresh spearmint leaves, chopped, packed
This was where I needed to send SP back to town. Not quite enough mint.
- 2 cups water
- 2 cups white vinegar
- 3 1/2 cups sugar (7/8 cups for each cup of juice)
Process
1. Combine
apple pieces with water and mint in a large pan. Bring water to a boil
then reduce heat and cook 20 minutes, until apples are soft.
2. Add vinegar, return to boil. Simmer covered, for about 5 more minutes.
3. Use a potato masher to mash up the apple pieces. Continue to the consistency of thin apple sauce. The mash should be quite runny, so feel free add another 1 cup of water to the pot. This is where I probably went wrong because I should have had it runnier because - see step 5.
4. Spoon the apple mash into a cheesecloth lined fine mesh sieve and suspend it over a large bowl. Leave to strain for several hours. Do not squeeze.
5. After a few hours about 4 cups of juice should have strained out of the mash. This is where I found I only yielded just over two cups of liquid - 20 ounces to be exact. Measure the juice, then pour into a large pot. Add 7/8 a cup of sugar for each cup of juice. Heat on high, stirring until the sugar gets dissolved. Be careful that it doesn't stick to the bottom of the pan or burn.
7. Continue to boil until a candy thermometer shows
that the temperature has reached at least 220-222°F. Additional
cooking time may be needed depending on levels of elevation, water,
sugar, or the apple
pectin in the mix.
8. Pour into sterilized* canning jars to within 1/4" from the top and seal. Yields approximately 4 8-ounce jars. I managed to eek out less than that because of having less liquid.
2. Add vinegar, return to boil. Simmer covered, for about 5 more minutes.
3. Use a potato masher to mash up the apple pieces. Continue to the consistency of thin apple sauce. The mash should be quite runny, so feel free add another 1 cup of water to the pot. This is where I probably went wrong because I should have had it runnier because - see step 5.
4. Spoon the apple mash into a cheesecloth lined fine mesh sieve and suspend it over a large bowl. Leave to strain for several hours. Do not squeeze.
5. After a few hours about 4 cups of juice should have strained out of the mash. This is where I found I only yielded just over two cups of liquid - 20 ounces to be exact. Measure the juice, then pour into a large pot. Add 7/8 a cup of sugar for each cup of juice. Heat on high, stirring until the sugar gets dissolved. Be careful that it doesn't stick to the bottom of the pan or burn.
6. Bring to a boil and
reduce the heat to medium or medium high, keeping it at a strong
simmer. Cook for 10-15 minutes, using a metal spoon to skim off the
surface scum. The surface scum is white and rather sticky so have a damp paper towel ready to wipe it off onto a plate.
8. Pour into sterilized* canning jars to within 1/4" from the top and seal. Yields approximately 4 8-ounce jars. I managed to eek out less than that because of having less liquid.
Here is where the leap of faith happened as I waited and waited to see if they set. As the night drew to a close and I headed to bed my jars had still not set. I woke in the morning completely thrown off my plan to check them by the fact that off all things I didn't prepare for work, I had neglected to set my alarm ahead an hour for daylight savings. Ugh. I had to wait until after work to check.
Low and behold - it worked! My jars set!
We are looking forward to enjoying this with lamb for Easter dinner and have some little jars to give away for Christmas. Natural mint jelly is such a beautiful golden color!
Sunday, March 12, 2017
A Lemon Salt while Finishing the Salt Preserved Lemons
Two days in advance of their being finished, I decided to re-jar my lemons into their final destination.I figured that while I did this I could make some lemon salt from the rinds of the lemons I used to add additional juice over the lemons.
I took the zest of two lemons and combined it with 2/3 a cup of sea salt in this handy mini chopper.
I then spread the mixture out over a cookie sheet and baked it at 200 degrees. I did it in 10 minute increments so that I could shake it up and mix it around between cook times. It dried out sufficiently in 20 to 30 minutes. I look forward to using this on chicken this spring.
I took the zest of two lemons and combined it with 2/3 a cup of sea salt in this handy mini chopper.
I then spread the mixture out over a cookie sheet and baked it at 200 degrees. I did it in 10 minute increments so that I could shake it up and mix it around between cook times. It dried out sufficiently in 20 to 30 minutes. I look forward to using this on chicken this spring.
Salt Preserved Egg Yolks
As part of my Food in Jars Challenge 2017, I ventured into the world of salt preservation with a potentially risky endeavor of egg yolk preservation. After dividing six egg yolks and whites, I nestled 6 raw egg yolks in salt for 6 weeks in the out door refrigerator.
So out came the muffin pan to gently remove the egg yolks.
The egg yolks had a firm yet tack feel, kind of like the inside of a sour patch kid or a gummy bear. We then needed to gently brush off the salt. The only brush I could find was a basting brush but it worked surprisingly well.
In respect to having limited time before dinner, I asked SP to lend a hand to the process.

In his excitement, he got a little over zealous and six egg yolks became five, when one landed in the garbage.

They were then carefully wrapped in cheese cloth ...
So out came the muffin pan to gently remove the egg yolks.
The egg yolks had a firm yet tack feel, kind of like the inside of a sour patch kid or a gummy bear. We then needed to gently brush off the salt. The only brush I could find was a basting brush but it worked surprisingly well.
In respect to having limited time before dinner, I asked SP to lend a hand to the process.

In his excitement, he got a little over zealous and six egg yolks became five, when one landed in the garbage.

They were then carefully wrapped in cheese cloth ...
and set out to hang for two weeks in the fridge.
But I couldn't help first taking a picture of their beautiful translucent glowing color.
Here they rest in the door of our fridge until the Pasta party on March 19th. Can't wait!
The making of a Shrub. Drink Mixology on a whole new level. Blood Orange Shrub.
Let me take a sec and fall back on some classic Monty Python: “First you must find... another shrubbery! Then, when you have
found the shrubbery, you must place it here, beside this shrubbery, only
slightly higher so you get a two layer effect with a little path
running down the middle. ("A path! A path!") Then, you must cut down the
mightiest tree in the forrest... with... a herring!”
Now seriously, who knew that a Shrub is a food item!? A shrub is " a combination of fruit, sugar and vinegar. When left to sit for a few days (or even longer), they develop a deep, sweet-tart flavor that is a wonderful addition to a glass of sparkling water, a batch of salad dressing, a fancy homemade cocktail, a marinade for meat or vegetables, or to a pan sauce. If you remember the essential ratio of one part sugar, one part vinegar, and a generous handful of fruit of some kind, you’ll be good."
Today I made two shrubs. I first made a blood orange shrub because of its beauty and Vitamin C boost, much sought after when I have been plagued by illness after illness this winter.
The beauty of the blood orange is the other reason I chose this shrub! I used THIS recipe at Food in Jars.
I juiced four blood oranges and yielded about 1 cup of gorgeous red juice. I used a wire sieve to filter out the pulp. I then added one cup sugar and let it sit for about an hour, stirring when ever I had the chance.
At the end of the hour, when all the granulated sugar had dissolved, I added 3/4 cup of Bragg's Apple Cider vinegar. It is resting in the fridge until next weekend when I will break it out for some sparkling cocktails during our pasta party to try out the salt preserved eggs!
Tuesday, February 28, 2017
Walnut and Goat Cheese Souffles from The Joy of Cooking
These walnut and goat cheese soufflés are from pg 139 In the Joy of Cooking. We serve these with a lightly dressed green salad. We chose an orange balsamic dressing.
Yield: 8 servings (in ramekins)
Ingredients
3/4 cup walnuts, toasted and finely chopped (almost to dust)
1/4 cup corn meal
3 Tablespoons unsalted butter
1/4 cup all purpose flour
2/3 cup milk
10 ounces fresh unripened goat cheese
4 large egg yolks
2 cloves garlic, very finely minced
1/4 teaspoon dried thyme
1/4 teaspoon salt
1/4 teaspoon ground white pepper
5 large egg whites
1/4 teaspoon cream of tartar
Process
Yield: 8 servings (in ramekins)
Ingredients
3/4 cup walnuts, toasted and finely chopped (almost to dust)
1/4 cup corn meal
3 Tablespoons unsalted butter
1/4 cup all purpose flour
2/3 cup milk
10 ounces fresh unripened goat cheese
4 large egg yolks
2 cloves garlic, very finely minced
1/4 teaspoon dried thyme
1/4 teaspoon salt
1/4 teaspoon ground white pepper
5 large egg whites
1/4 teaspoon cream of tartar
Process
- Preheat oven to 350 degrees.
- Combine walnuts and cornmeal
- Butter 8 six ounce ramekins and coat with the nut cornmeal mixture. If there is any left over nut mixture, scatter in the bottom of the ramekins.
- Melt butter in a saucepan over medium heat.
- In the sauce pan, whisk in the flour and cook stirring for one minute.
- Add the milk and, stirring briskly, bring to a boil. It will be very thick.
- Scrape mixture out into a bowl and add the cheese. Mash it until it is melted.
- Beat in egg yolks, garlic, thyme, salt, and pepper.
- In another bowl, beat the egg whites and tartar until stiff but not dry.
- Stir 1/4 of the egg whites into the batter to loosen it up. The fold the rest of the whites into the batter.
- Pour mixture into the ramekins. Smooth the tops.
- Place them in a water bath, 1/2 to 3/4 up sides of ramekins.
- Bake in oven until a skewer comes out clean (~30 minutes)
- Let stand for 15 minutes in water bath.
- Invert and serve.
Chickpea and Spinach Stew from Food and Wine
This is a recipe for a tasty chickpea stew that was riffed off a Food and Wine recipe. I added a couple tablespoons tomato paste and a couple cups chicken stock. It was simmered uncovered for a while to let the flavors marry. We served it over rice cooked in chicken stock.
Chickpea and Spinach Stew from Food and Wine
Ingredients
1. Prepare the rice and cook, according to instructions, in chicken stock in place of water.
2. Pour the water into a large deep skillet and bring to a boil.
3. Add the spinach leaves and cook over high heat, stirring frequently, until wilted. (~2 minutes)
4. Drain the spinach in a colander and press to extract the liquid.
5. Coarsely chop the spinach.
6. Take the mashed garlic and mix it with the salt and saffron. Mix into a paste.
7. Transfer paste to a small bowl. Add the paprika, cumin, cloves and black pepper and mash together until thoroughly combined. Stir in 1/4 cup of the chickpea liquid.
8. Wipe out the skillet. Add 2 Tablespoons of olive oil to the skillet and heat until shimmering.
9. Add the onion and tomato and cook over medium high heat. Stir occasionally until softened (~3 minutes).
10. Add the garlic mash to the skillet and cook for 1 minute.
11. Add the chickpeas to the skillet.
12. Add the raisins and bring to a boil over medium high heat.
13. Add 2-3 tomato paste to thicken.
14. Add the spinach and reduce heat to medium and SIMMER for 15 minutes.
15. Add chicken stock to achieve desired saucy-ness.
16. Lay out serving dishes and fill with the rice cooked in chicken stock. Add chickpea stew to bowls. Drizzle with the remaining olive oil and serve.
Chickpea and Spinach Stew from Food and Wine
Ingredients
- 1 cup water
- 10 ounces leaf spinach
- 2 large garlic cloves, crushed
- Kosher salt
- Pinch of saffron threads
- 2 teaspoons sweet paprika
- 1 teaspoon ground cumin
- Pinch of ground cloves
- Pinch of freshly ground pepper
- Two 15-ounce cans chickpeas with their liquid
- 1/4 cup extra-virgin olive oil
- 1 small onion, finely chopped
- 1 large tomato—peeled, seeded and coarsely chopped
- 1/4 cup golden raisins
- 2-3 tbl spoons tomato paste
- rice
- 1 cup (+ whatever is needed for rice) chicken stock
1. Prepare the rice and cook, according to instructions, in chicken stock in place of water.
2. Pour the water into a large deep skillet and bring to a boil.
3. Add the spinach leaves and cook over high heat, stirring frequently, until wilted. (~2 minutes)
4. Drain the spinach in a colander and press to extract the liquid.
5. Coarsely chop the spinach.
6. Take the mashed garlic and mix it with the salt and saffron. Mix into a paste.
7. Transfer paste to a small bowl. Add the paprika, cumin, cloves and black pepper and mash together until thoroughly combined. Stir in 1/4 cup of the chickpea liquid.
8. Wipe out the skillet. Add 2 Tablespoons of olive oil to the skillet and heat until shimmering.
9. Add the onion and tomato and cook over medium high heat. Stir occasionally until softened (~3 minutes).
10. Add the garlic mash to the skillet and cook for 1 minute.
11. Add the chickpeas to the skillet.
12. Add the raisins and bring to a boil over medium high heat.
13. Add 2-3 tomato paste to thicken.
14. Add the spinach and reduce heat to medium and SIMMER for 15 minutes.
15. Add chicken stock to achieve desired saucy-ness.
16. Lay out serving dishes and fill with the rice cooked in chicken stock. Add chickpea stew to bowls. Drizzle with the remaining olive oil and serve.
Monday, February 27, 2017
Potato Puffs with leftover shredded chicken and gravy
The next time you have left overs from a roasted chicken (or turkey) and pan gravy, you need to make these melt in your mouth potato puffs! With a recipe found on TheKitchn.com , SP transformed boring left overs into something amazing!
Ingredients
2 cups mashed potatoes
3 large eggs, beaten
1 cup grated cheese such as Parmesan or Gruyere, divided
1/4 cup minced chives
1/4 cup diced cooked bacon or ham, optional
shredded chicken or turkey left overs
Salt and freshly ground pepper
Left over gravy (heated before serving)
Process
1. Preheat the oven to 400°F. Lightly grease the cups of a mini-muffin tin.
2. Whisk together the mashed potatoes, the eggs, 3/4 cup of cheese, the chives, and meat.
3. Season as needed with salt and pepper.
4. Mound a spoonful of the mixture in each muffin cup, creating a divot in the top as a reservoir for the gravy.
5. Sprinkle the tops with the remaining 1/4 cup of grated cheese.
6. Bake for 20 minutes, or until the potato cups are set, browned on top, and hot through.
7. Let cool for about 5 minutes in the pan, then use a spoon or knife to gently release them from the pan.
8. Reheat the gravy, ladle over the potato puff and serve.
Ingredients
2 cups mashed potatoes
3 large eggs, beaten
1 cup grated cheese such as Parmesan or Gruyere, divided
1/4 cup minced chives
1/4 cup diced cooked bacon or ham, optional
shredded chicken or turkey left overs
Salt and freshly ground pepper
Left over gravy (heated before serving)
Process
1. Preheat the oven to 400°F. Lightly grease the cups of a mini-muffin tin.
2. Whisk together the mashed potatoes, the eggs, 3/4 cup of cheese, the chives, and meat.
3. Season as needed with salt and pepper.
4. Mound a spoonful of the mixture in each muffin cup, creating a divot in the top as a reservoir for the gravy.
5. Sprinkle the tops with the remaining 1/4 cup of grated cheese.
6. Bake for 20 minutes, or until the potato cups are set, browned on top, and hot through.
7. Let cool for about 5 minutes in the pan, then use a spoon or knife to gently release them from the pan.
8. Reheat the gravy, ladle over the potato puff and serve.
Baba's Baby Mug - a treasure from Marcia Sewall (the first?)
I have this wonderful mug that has been passed down to me. One memory I have of it was that HiHo used to keep it in the refrigerator with fresh bunches of mint from the garden. This silver mug, we believe given as a present when she was a baby has classic workmanship seldom seen to this day. I decided that I would take a picture of it and post it now, thought it will take me some time to get back to Baba's recipes!
Acorn Bread
Labels:
acorn,
acorn flour,
bread,
flour,
home grown,
home made,
local,
sustainable
Highland Ridge Preschool Apple Crisp
This recipe comes from Baby's preschool. It is uber yummy! it has become a daily book end - we have it for breakfast AND dessert!
Ingredients
4 (or more) peeled, cored and sliced apples
3/4 cup all-purpose flour
3/4 cup (or more) packed brown sugar
1/2 cup (or more) oats
1 and 1/2 teaspoon ground cinnamon
1/2 cup softened butter
Process
Ingredients
4 (or more) peeled, cored and sliced apples
3/4 cup all-purpose flour
3/4 cup (or more) packed brown sugar
1/2 cup (or more) oats
1 and 1/2 teaspoon ground cinnamon
1/2 cup softened butter
Process
- Preheat oven to 375 degrees
- Spread the apples in an un-greased 8 x 10 baking pan
- Mix remaining ingredients with a fork and spread over apples
- Bake uncovered for about 30 minutes or until the topping is golden brown and the apples are tender.
- let cool for 5 minutes
Subscribe to:
Posts (Atom)