Thursday, April 20, 2017

Fruit leather

We picked 20.5 pounds of blueberries so far this summer and with the encouragement of my midwife friend Abby I made leather last night and I am sold! I am already saving my pennies so I can buy the industrial dehydrator from Cabellas!


Until the time comes that I can afford it, I will have to live vicariously through the graces of a friend. Thanks Abby! Here comes the tricky part though as Abby needed to walk me through it because she is the kind of genius that does things in her head and hates following recipes. I am only able to do that after I have made it once or twice and THEN I can tinker. Because of this, Abby walked me through the entire process up until the dehydrating part, because then it is just an aspect of time. Through this process, I have cobbled together a list of ingredients but the amounts are entirely NON-SPECIFIC because you truly can not F up fruit leather.

Ingredients

lots and lots of Berries (any kind will work but blueberries are the best and strawberries make a different type even though I used a pint in this leather.)
1 orange
the zest of the orange
a dash lemon juice
a pinch of salt
a couple table spoons maple syrup
1 TB cinnamon
1 TB nutmeg
a small amount of ground cloves (careful as this concentrates over time)
1 tsp dried ginger - to taste so be moderate
1 TB Vanilla
a dehydrator
parchment paper


Directions

1. Fill pot with Berries


2. Add the Juice of a large orange


3. Macerate the berries as you bring it to a slow boil over a low heat.
Let it soften up and get nice and happy.


4. Start adding your spices


5. Bring to a boil and stir requently.  Let it get nice and hot and happy and bubble away.  over medium heat at a rolling simmer.


6. As it thickens let it cool down a bit and then turn off for 30 minutes. Stir periodically until it stops steaming when you stir. During this time, get the dehydrator shelves ready and cut parchment paper to size to cover the shelves. Here's Abby helping.


7. In batches, run the berries through quick bursts in the blender. You want a think chunky mixture as it binds together better in making leather. This was my first round and it was a bit too thin.


8. Pour a generous circle of mixture of center of parchment paper covered tray and smooth out with a rubber spatula until it is spread into a uniform shaped layer.


9. When layer is even and covers the paper like the picture above, put shelve into the dehydrator and continue with the remaining berry mixture.


Leather dries in the dehydrator until dry when it no longer is tacky/sticks to your finger when touched.

Here are a few picture of me having my hand in it.


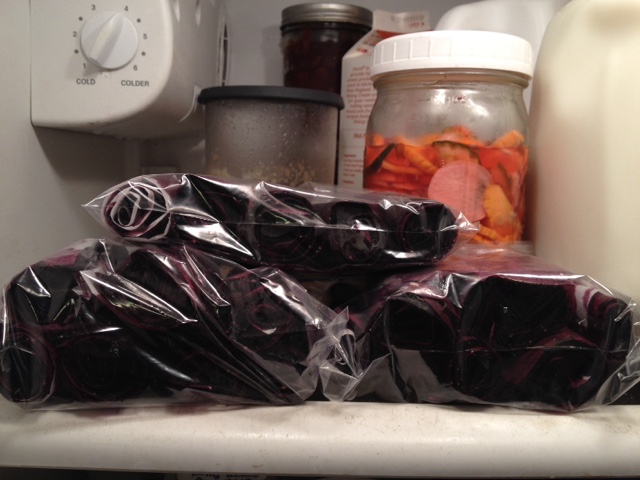
10. The final step is to cut the parchment paper into equal long strip and roll the leather fruit side in into roll ups and store in a plastic bag in a refridgerator until gone and it is time to make some more!
Saturday, April 8, 2017

Quick Pickled Vegetables

One of our favorite meals to make is spring rolls with pickled vegetables, very similar to Bahn Mi and other Vietnamese meals. I immediately thought of the coming spring weather and this healthy meal when presented with Aprils Food in Jars Mastery Challenge - Quick Pickles. This very easy one jar wonder makes a wonderful crispy pickle for any dish.

Ingredients
A variety of veggies (I used a carrot, a cucumber, a celery stalk, a piece of pepper)
one wide mouth 1/2 quart mason jar
For pickling juice: 
1 cup rice vinegar
1 tsp. celery seed
1 tsp. coriander seed
1 tsp. peppercorns
1 bay leaf
lemon zest

Process
1. Prepare your vegetables and cut to roughly the height of the jar.


2. Using one of my favorite kitchen utensils, cut the vegetables into tiny strips. If not julienne them. 


3. Pack them into the jar in alternating layers of color.


4. Reserve what ever scraps you have for vegetable stock and store in the freezer.


5. In a small sauce pan, prepare the pickling juice.


6. Bring pickling juice to a boil over high heat and allow continue heating for a minute or so.


7. Pour hot pickling juice over vegetables in the Mason jar.


8. Cover tightly and refrigerate until ready to use.
HERE IT IS HANGING OUT WITH ITS FRIENDS


My quick pickled vegetables are ready to go any time but for now I will just let them get tasty while resting with the salt preserved lemons and the Strawberry, blackberry, blueberry shrub I made for this week's mocktails.

Pomegranate Jelly


As part of the Food In Jars Mastery Challenge, I was enticed to make Pomegranate Jelly.  April's challenge is quick pickles and March's was Jelly and since I didn't get around to making Pomegranate jelly I thought better late than never!? Boy was I right because Pomegranate Jelly is my new favorite jelly. It is just SO good!

Ingredients
5 Cups Pomegranate Juice - I used Poms


5 Cups Sugar
2 3.5 oz. Boxes regular, powdered pectin (I used the pectin below - be careful to read the directions - it uses Teaspoons NOT Tablespoons)


Process
1. Prepare you hot water bath canner with your jars. Expect  roughly 6+ cups of jelly. Place lids and rims in a saucepan with hot water and heat.


2. In large pot bring the juice to a boil.


3. Once boiling, sprinkle in the pectin whisk quickly. Add pectin slowly or it  will clump.


4. Bring to a boil once again. When the juice mixture boils again, slowly whisk in the sugar to avoid clumping and temperature dropping

5. Once all of the sugar is added and whisked in, bring the mixture to a full rolling boil  let it boil for 1 minute. This is where the large pot is necessary as the level will rise as the juice foams.


6. After you let it have a good rolling boil,  turn off the heat, let it settle. Test to see if it has gelled enough using a cold spoon.

7. Skim off any foam.

8. Fill hot jars with jelly, leaving 1/4″ head space. Using a damp paper towel, wipe any residue off the rims. Place hot lids and tighten rings onto jars.

9. Process in a boiling hot water bath for 10 minutes. Remove and check out that color!


This beautiful jelly is a welcome addition to this homestead kitchen!


CHRISTMAS PRESENTS TO BOOT!