Sunday, March 26, 2017
Kartoffel-Bacon-Tarte AKA Bacon Pie
I can't translate German but this video is fairly strait forward.
It says I can embed which I will try above, if not below is the Youtube link.
https://youtu.be/nwyh31pOjgs
The recipe is posted here:
http://www.leckerschmecker.me/im-knuspermantel/
You can't make this s**t up and it was well deserved after a long day boiling syrup outside, even if that meant that we didn't eat until 10:30. I rallied against it because it looked like a risk and it would take about 3 hours between the trip to town and the 2.5 hour cooking time. Nonetheless, they persisted and we had it for dinner.
It's fairly straight forward.
Ingredients
Large cast iron pot
Two or more packages of bacon
2 lb white potatoes
1 lb shredded cheese
salt and pepper
Process
1. Preheat the oven to 375 degrees.
2. Lay out the bacon as showed in the video. You want half the strip in and half the strip out.
3. Place a layer of sliced potatoes.
4. Season with salt and pepper.
5. Cover with a layer of cheese.
6. Repeat steps 3 and 4, with a little pepper (no more salt) one more time.
7. Fold the bacon strips over the top of the pie.
8. Bake in oven uncovered for 2.5 hours.
9. Let cool a bit and then serve. You may want to pat with a paper towel to absorb some of the excess fat and grease.
10. Eat with some fresh vegetables. Cover your head in a napkin and hide from God as you eat such a sinful meal. Thank you Anthony Bourdain for allowing us a way to escape the embarrassment of our gluttony.
Tuesday, March 21, 2017
Preservation Pasta Party
Friends gathered on the porch to witness the final sunset of winter while enjoying my recently made Shrubs. On a warm March afternoon, the mocktails were refreshing and healthy - made with seltzer and sparkling lemonade and our Blood Orange shrub (above) and Blueberry Ginger shrub (below).
SP and I were busy bustling in and out, making the pasta dough or turning the salt preserved lemons into viniagrette. In other moments I was making a red sauce, prepping garlic bread, and then turning to make an Alfredo. Finally I got to put the salad together.
 The salad dressing was much saltier than I wanted, but it is absolutely PERFECT over beets. The two compliment each other perfectly. I will be buying beets this week to use the rest of the dressing on.
 The best part of the night, was having everyone gather in the dining room to all help rolling out the dough and making it into pasta. This time the pasta making went much more smoothly.
There was the boys side of the table:
And a the ladies side of the table:
Finally it was time to turn the pasta sheets into fettuccine.
We probably should have let them hang a little longer before bunching them up as a bunch or two were a bit too sticky to unwind and go into the water.
Below is the piece d'resistance! Was the freshly made pasta with salt preserved egg yolk grated over the top. Yummy salty treat!
Sunday, March 19, 2017
Preserved Lemon Vinaigrette and other ideas
Sorry for the blurry photo but I was rushing to get dinner on the table while the pasta finished cooking. I made Marisa's viniagrette below and put it over this wonderful soft salad made of red leaf lettuce, cut orange tomatoes, avocado, and yummy Love beets.
I am posting some recipes here to save them in advance of tonight's homemade pasta party. Tonight we will be celebrating the completion of the lemons as well as my salt preserved eggs!
I will add some pictures after the party.
From Epicurious:
Ingredients
- 1 tablespoon minced preserved lemon
- 6 tablespoons extra-virgin olive oil
- 2 tablespoons lemon juice
- 1/4 teaspoon red pepper flakes
- 1 sprig fresh thyme, leaves finely chopped
- 1 pinch salt
- Rind of half of a preserved lemon, rinsed and finely diced (about 2 tablespoons in total)
- 2 teaspoons fresh lemon juice, or to taste
- 5 tablespoons of your favorite extra-virgin olive oil
But I think the direction I will take is from Marisa's post on Food in Jars : http://foodinjars.com/2013/01/preserves-in-action-pureed-preserved-lemons/
To quote Marisa: "
The best thing about blending the lemons is that once you’ve scraped what you can out of the blender pitcher, you’re already halfway to a great salad dressing. Because it’s inevitable that you won’t be able to get every last bit out of the blender. Instead of surrendering and cleaning it out in the sink, add a little water, honey, and freshly ground pepper. Put the pitcher back on the blender base, run the motor on low and drizzle in a little olive oil. As soon as it develops a thick consistency, you’re done.
The finished dressing is creamy and tart, but without the throat-catching acidity that a vinegar-based dressing can have. I made a not-so-seasonal salad of halved grape tomatoes and avocado, covered it with my blender dressing and heaped it on a pile of torn lettuce. It made for a really great weekday lunch."
Friday, March 17, 2017
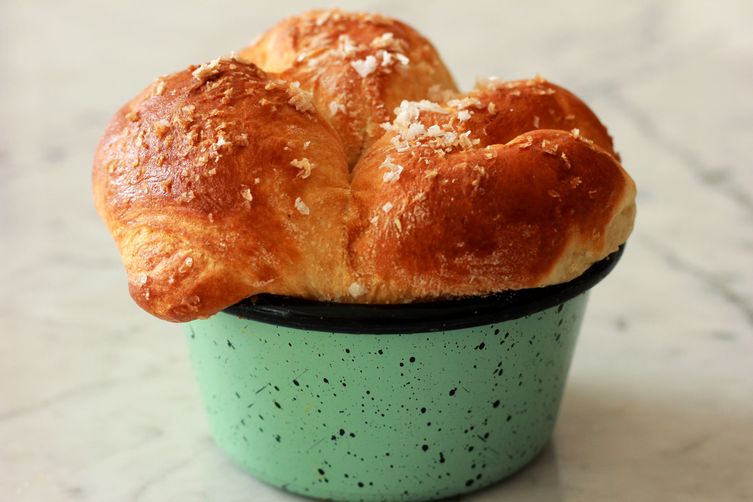
Milk Bread

I have been drooling over this recipe that I received in my email from Food 52. I am not able to get to it today, but I might try my hand at this tomorrow in preparation for the pasta night we are having on Sunday. It looks and sounds wonderful!
The original recipe can be found here:
Kindred's Milk Bread
Makes 6 rolls, two 9- by 5-inch loaves, or 12 split-top buns
Ingredients:
5 1/3 cups bread flour, divided, plus more for surface (Kindred uses King Arthur)
1 cup heavy cream
1/3 cup mild honey (such as wildflower or alfalfa)
3 tablespoons nonfat dry milk powder (such as Alba)
2 tablespoons active dry yeast (from about 3 envelopes)
2 tablespoons kosher salt
3 large eggs, divided
4 tablespoons (1/2 stick) unsalted butter, cut into pieces, at room temperature
Nonstick vegetable oil spray
Flaky sea salt (optional, but shouldn't be)
- Cook 1/3 cup flour and 1 cup water in a small saucepan over medium heat, whisking constantly, until a thick paste forms (almost like a roux but looser), about 5 minutes.
- Add cream and honey and cook, whisking to blend, until honey dissolves.
- Transfer mixture to the bowl of a stand mixer fitted with a dough hook and add milk powder, yeast, kosher salt, 2 eggs, and 5 remaining cups flour.
- Knead on medium speed until dough is smooth, about 5 minutes. Add butter, a piece at a time, fully incorporating into dough before adding the next piece, until dough is smooth, shiny, and elastic, about 4 minutes.
- Coat a large bowl with nonstick spray and transfer dough to bowl, turning to coat.
- Cover with plastic wrap and let rise in a warm, draft-free place until doubled in size, about 1 hour.
- If making rolls, lightly coat a 6-cup jumbo muffin pan with nonstick spray. Turn out dough onto a floured surface and divide into 6 pieces. Divide each piece into 4 smaller pieces (you should have 24 total). They don’t need to be exact; just eyeball it. Place 4 pieces of dough side-by-side in each muffin cup.
- If making loaves, lightly coat two 9- by 5-inch loaf pans with nonstick spray. Turn out dough onto a floured surface and divide into 12 pieces. Nestle pieces side-by-side to create 2 rows down length of each pan.
- If making split-top buns, lightly coat two 9- by 13-inch baking dishes with nonstick spray. Divide dough into 12 pieces and shape each into a 4-inch long log. Place 6 logs in a row down length of each dish.
- Let shaped dough rise in a warm, draft-free place until doubled in size (dough should be just puffing over top of pan), about 1 hour.
- Preheat oven to 375° F.
- Beat remaining egg with 1 teaspoon. water in a small bowl to blend.
- Brush top of dough with egg wash and sprinkle with sea salt, if desired.
- Bake, rotating pan halfway through, until bread is deep golden brown, starting to pull away from the sides of the pan, and is baked through, 25 to 35 minutes for rolls, 50 to 60 minutes for loaf, or 30 to 40 minutes for buns.
- If making buns, slice each bun down the middle deep enough to create a split-top. Let milk bread cool slightly in pan on a wire rack before turning out; let cool completely.
Tuesday, March 14, 2017
Blueberry Ginger Shrub
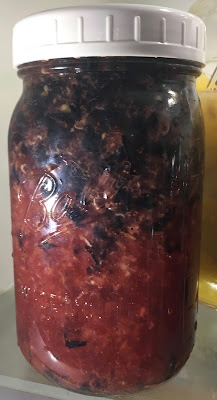
As part of the March Food in Jars Challenge, I made another shrub inspired by my desire to kick my immune system back into high gear. I thought the medicinal ginger and the antioxidant blueberries were quite the touch. I used Marisa's Blueberry Ginger Shrub recipe from Food in Jars and doubled it. If you do attempt this and double it, don't muddle in the quart jars as there just isn't enough room to move around, so use a 4 cup measuring cup before pouring it into the mason jar.
Ingredients (for a single recipe)
One heaping cup of blueberries
3/4 cup sugar
One cup unfiltered Apple Cider Vinegar (I use Bragg's)
2 inch piece of ginger, peeled
Process
1. Put blueberries in a mason jar and cover with the sugar.
2. Using a muddler or a pestle, mash the blueberries and sugar together and smash into a sweet pukpy mess. The more mess the merrier.
3. Add the vinegar to the jar and stir it all together, vigorously.
4. Grate the ginger over the mess in the jar.
5. Put a lid over the jar and give it a good shake. Dance around the kitchen with it for little while if it makes you smile. The shrub will love the entertainment.
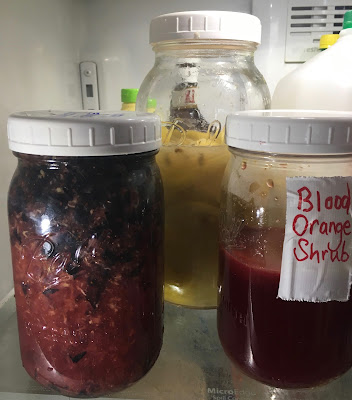
6. Put your shrub in the fridge and let it hang out with it's friends for a few days. Here's mine with the Blood Orange Shrub and neighbors Salt Preserved Lemons. (darn A-1 trying to get its moment in the spotlight).
7. Day two or three, strain the Shrub.
8. Return to a covered mason jar and place in fridge. Use as a mixer in drink of your choice. Here's one recipe I found: http://www.saveur.com/carolina-blueberry-shrub-cocktail-recipe
Mint Jelly with all natural Pectin for the Food in Jars March Challenge
For the Food in Jars March Challenge, I once again threw my hat into uncharted water and tried this recipe for Mint Jelly. I was nervous about this recipe because it called for using apples to draw out the natural pectin. I intuitively knew this was the natural process but doubted that little ole me could pull it off. Would it work or fail miserably? Would it set? What if I didn't draw off enough liquid? I cursed myself apparently because I only drew off just over half the liquid and almost scrapped the whole project. I felt defeated and ready to throw in the towel, but SP boosted my spirits with some encouragement and then some laughter at my own expense - I looked like a hot mess and he still loved me. Nevertheless, I persisted.

Ingredients
- 4 lbs of tart apples (e.g. Granny Smith), un-peeled, chopped into big pieces, including the cores (including the cores is important as this is where most of the natural pectin is)
-

- 3 cups of fresh spearmint leaves, chopped, packed

This was where I needed to send SP back to town. Not quite enough mint.
- 2 cups water
- 2 cups white vinegar
- 3 1/2 cups sugar (7/8 cups for each cup of juice)
Process
1. Combine
apple pieces with water and mint in a large pan. Bring water to a boil
then reduce heat and cook 20 minutes, until apples are soft.
2. Add vinegar, return to boil. Simmer covered, for about 5 more minutes.
3. Use a potato masher to mash up the apple pieces. Continue to the consistency of thin apple sauce. The mash should be quite runny, so feel free add another 1 cup of water to the pot. This is where I probably went wrong because I should have had it runnier because - see step 5.
4. Spoon the apple mash into a cheesecloth lined fine mesh sieve and suspend it over a large bowl. Leave to strain for several hours. Do not squeeze.
5. After a few hours about 4 cups of juice should have strained out of the mash. This is where I found I only yielded just over two cups of liquid - 20 ounces to be exact. Measure the juice, then pour into a large pot. Add 7/8 a cup of sugar for each cup of juice. Heat on high, stirring until the sugar gets dissolved. Be careful that it doesn't stick to the bottom of the pan or burn.
7. Continue to boil until a candy thermometer shows
that the temperature has reached at least 220-222°F. Additional
cooking time may be needed depending on levels of elevation, water,
sugar, or the apple
pectin in the mix.
8. Pour into sterilized* canning jars to within 1/4" from the top and seal. Yields approximately 4 8-ounce jars. I managed to eek out less than that because of having less liquid.
2. Add vinegar, return to boil. Simmer covered, for about 5 more minutes.
3. Use a potato masher to mash up the apple pieces. Continue to the consistency of thin apple sauce. The mash should be quite runny, so feel free add another 1 cup of water to the pot. This is where I probably went wrong because I should have had it runnier because - see step 5.
4. Spoon the apple mash into a cheesecloth lined fine mesh sieve and suspend it over a large bowl. Leave to strain for several hours. Do not squeeze.
5. After a few hours about 4 cups of juice should have strained out of the mash. This is where I found I only yielded just over two cups of liquid - 20 ounces to be exact. Measure the juice, then pour into a large pot. Add 7/8 a cup of sugar for each cup of juice. Heat on high, stirring until the sugar gets dissolved. Be careful that it doesn't stick to the bottom of the pan or burn.
6. Bring to a boil and
reduce the heat to medium or medium high, keeping it at a strong
simmer. Cook for 10-15 minutes, using a metal spoon to skim off the
surface scum. The surface scum is white and rather sticky so have a damp paper towel ready to wipe it off onto a plate.
8. Pour into sterilized* canning jars to within 1/4" from the top and seal. Yields approximately 4 8-ounce jars. I managed to eek out less than that because of having less liquid.
Here is where the leap of faith happened as I waited and waited to see if they set. As the night drew to a close and I headed to bed my jars had still not set. I woke in the morning completely thrown off my plan to check them by the fact that off all things I didn't prepare for work, I had neglected to set my alarm ahead an hour for daylight savings. Ugh. I had to wait until after work to check.
Low and behold - it worked! My jars set!
We are looking forward to enjoying this with lamb for Easter dinner and have some little jars to give away for Christmas. Natural mint jelly is such a beautiful golden color!
Sunday, March 12, 2017
A Lemon Salt while Finishing the Salt Preserved Lemons
Two days in advance of their being finished, I decided to re-jar my lemons into their final destination.I figured that while I did this I could make some lemon salt from the rinds of the lemons I used to add additional juice over the lemons.
I took the zest of two lemons and combined it with 2/3 a cup of sea salt in this handy mini chopper.
I then spread the mixture out over a cookie sheet and baked it at 200 degrees. I did it in 10 minute increments so that I could shake it up and mix it around between cook times. It dried out sufficiently in 20 to 30 minutes. I look forward to using this on chicken this spring.
Salt Preserved Egg Yolks
As part of my Food in Jars Challenge 2017, I ventured into the world of salt preservation with a potentially risky endeavor of egg yolk preservation. After dividing six egg yolks and whites, I nestled 6 raw egg yolks in salt for 6 weeks in the out door refrigerator.
So out came the muffin pan to gently remove the egg yolks.

The egg yolks had a firm yet tack feel, kind of like the inside of a sour patch kid or a gummy bear. We then needed to gently brush off the salt. The only brush I could find was a basting brush but it worked surprisingly well.
In respect to having limited time before dinner, I asked SP to lend a hand to the process.

In his excitement, he got a little over zealous and six egg yolks became five, when one landed in the garbage.

They were then carefully wrapped in cheese cloth ...
So out came the muffin pan to gently remove the egg yolks.

The egg yolks had a firm yet tack feel, kind of like the inside of a sour patch kid or a gummy bear. We then needed to gently brush off the salt. The only brush I could find was a basting brush but it worked surprisingly well.
In respect to having limited time before dinner, I asked SP to lend a hand to the process.

In his excitement, he got a little over zealous and six egg yolks became five, when one landed in the garbage.

They were then carefully wrapped in cheese cloth ...
and set out to hang for two weeks in the fridge.
But I couldn't help first taking a picture of their beautiful translucent glowing color.
Here they rest in the door of our fridge until the Pasta party on March 19th. Can't wait!
Subscribe to:
Comments (Atom)


